Create Models
Meshery offers two primary ways to bring models into your system: Create and Import.
- Import is ideal when you already have a model definition file (e.g., JSON, CSV) and simply want to bring it into Meshery.
- Create is the recommended approach if you’re starting fresh — it guides you through building a model step by step using an intuitive UI wizard.
This section walks you through the Create workflow — perfect for users who want full control over naming, styling, and categorizing their models while sourcing CRDs from GitHub or ArtifactHub.
Tip: If you don’t have any files yet, start with Create. You can always export or re-import your model later.
The URL Create feature allows you to create models in Meshery by providing URLs to source repositories or package registries. Here's how to use it:
Step 1: Open the Model Generation Interface
Go to the Registry section in the Meshery UI. Click the create button to start creating a new model.
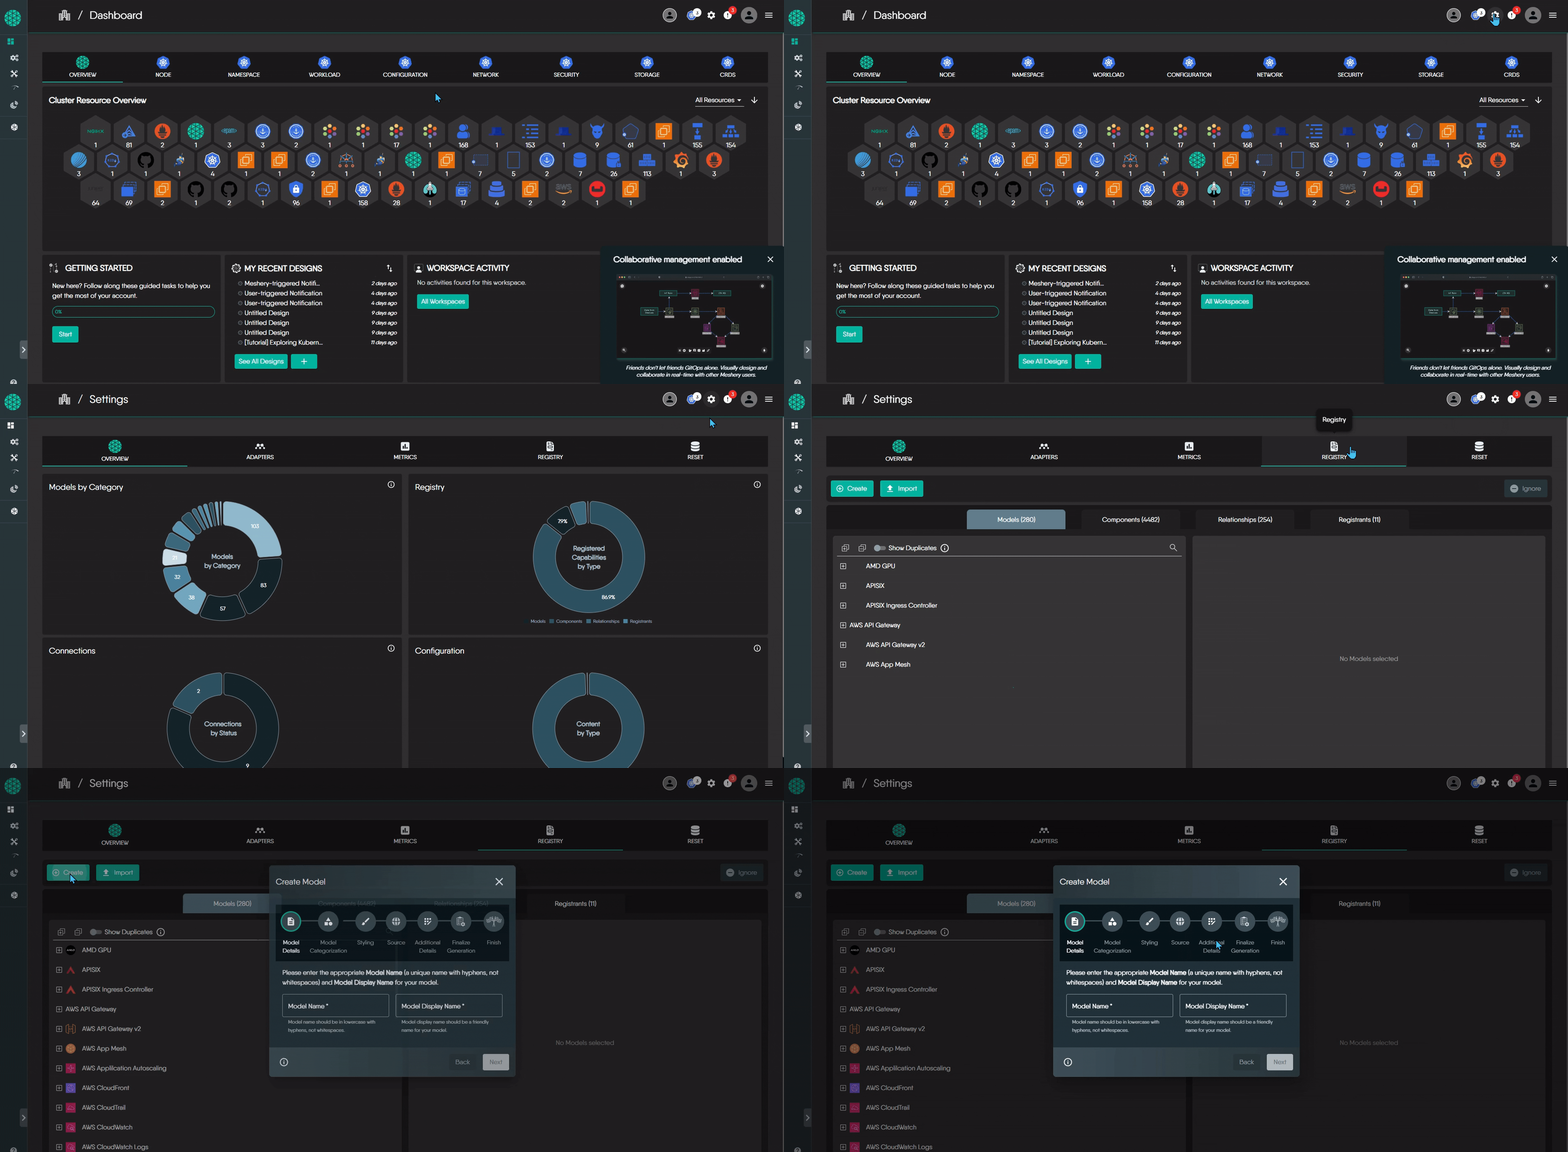
Step 2: Set Up Your Model Name
Enter the following names for your model:
- Model Name: This is the unique, system identifier. Use lowercase letters and hyphens only (no spaces).
Example:cert-manager - Display Name: This is the friendly name displayed in the UI. It can include spaces and uppercase letters.
Example:Cert Manager
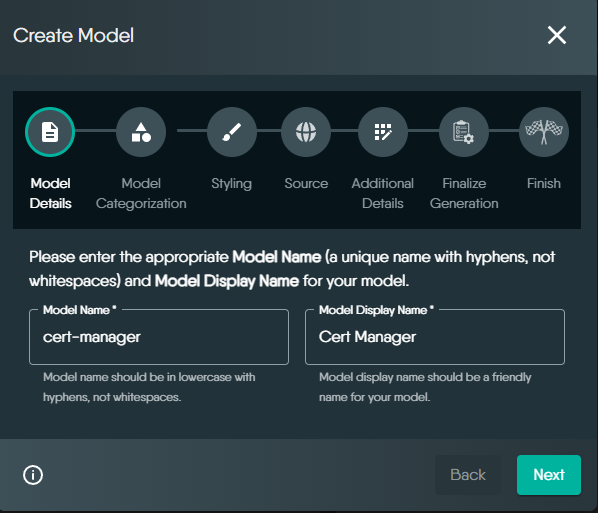
Step 3: Set Model Categorization
Select the appropriate Category and Subcategory from the dropdowns. If your model doesn't match any available category, choose Uncategorized to ensure it can be easily located later.
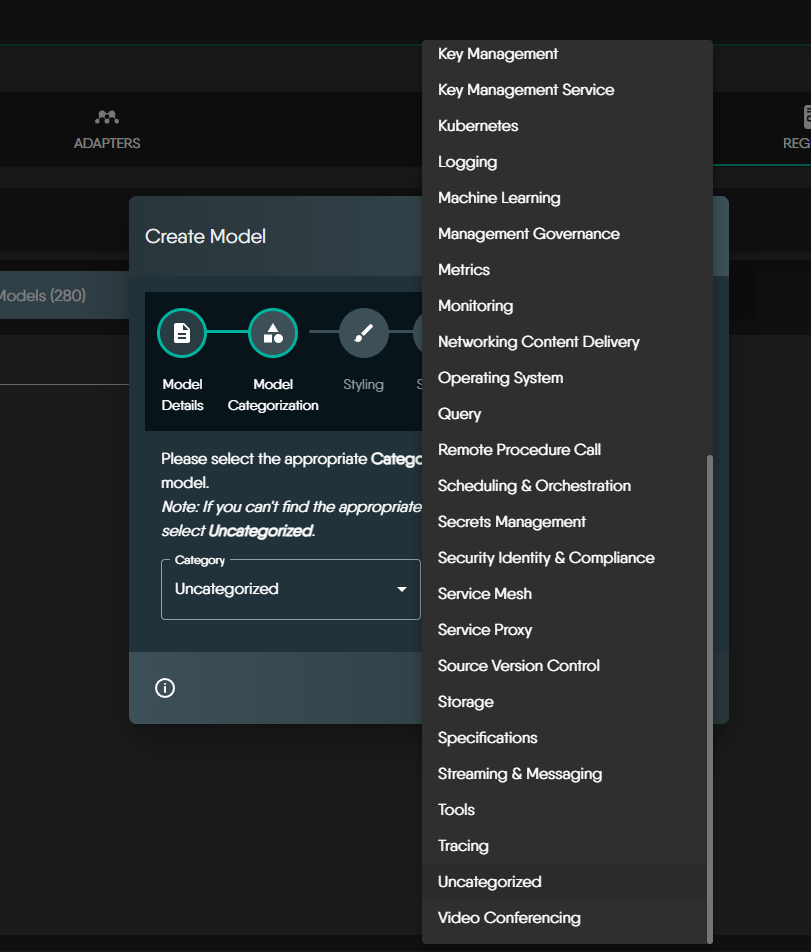
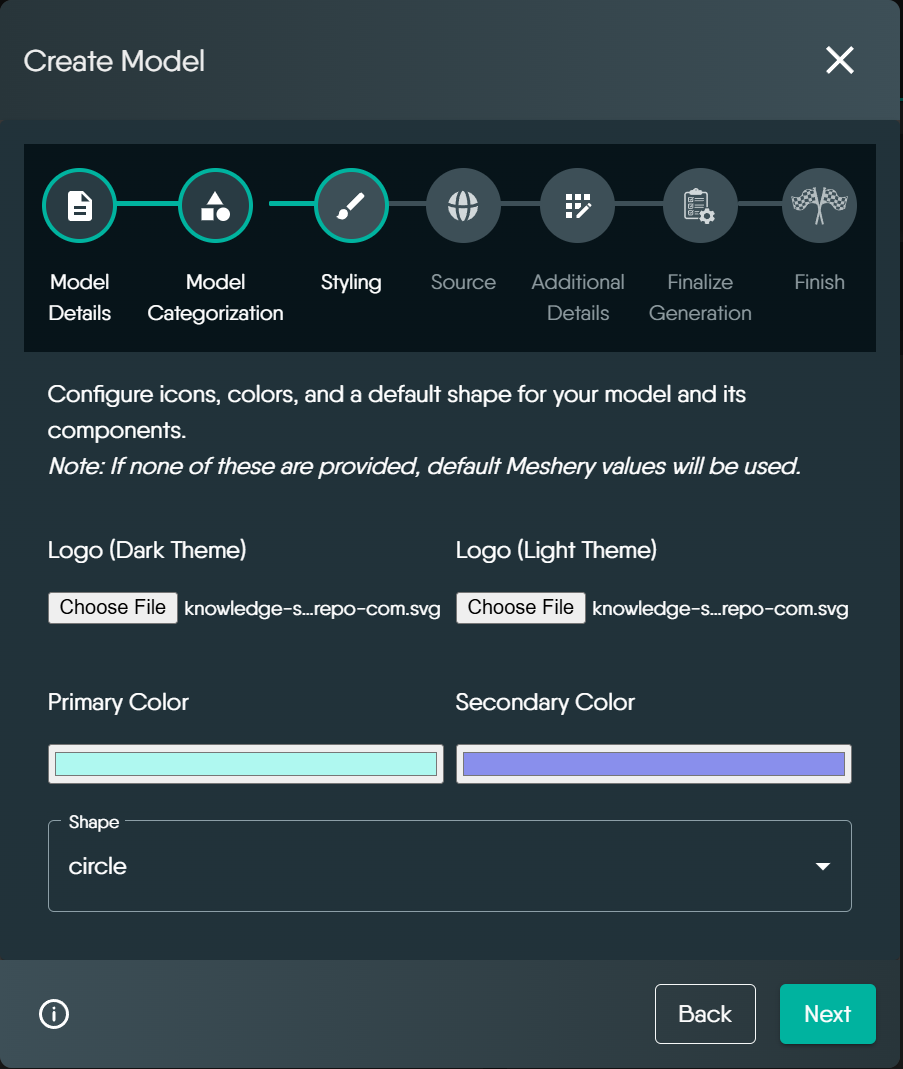
Step 4: Configure Model Styling
Customize your model's appearance:
- Logos: Upload separate images for dark and light themes.
- Colors: Define the primary and secondary colors for your model's visual elements.
- Icon Shape: Choose a shape for the model’s icon as displayed in the UI.
Note: If you don't provide custom styling, Meshery's default values will be used.
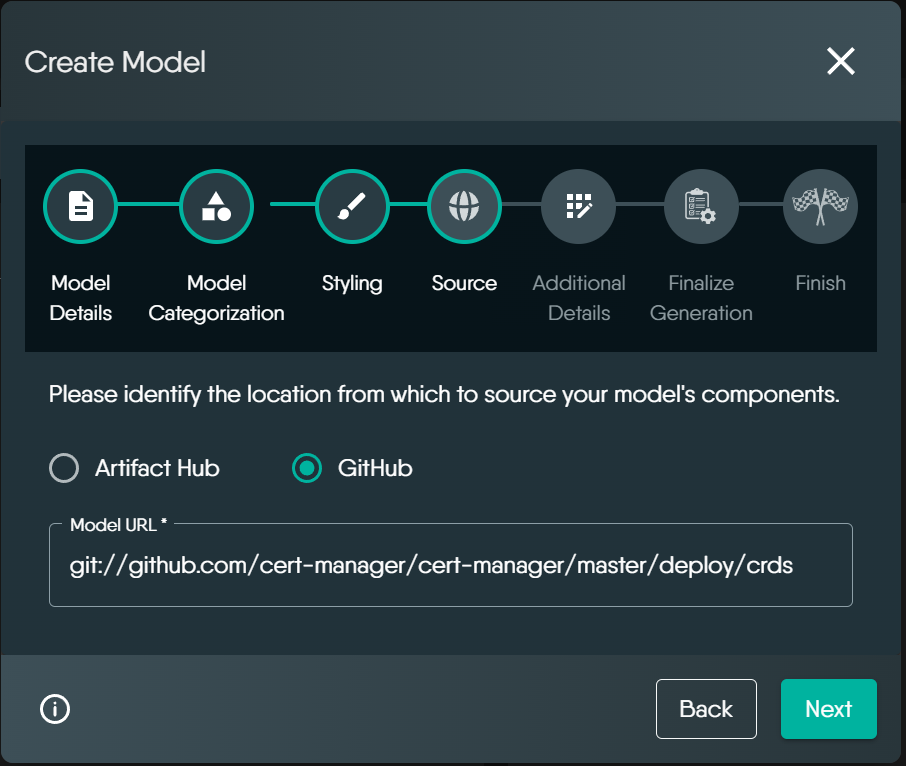
Step 5: Provide the Source Location
Specify the source for your model by entering one of the following URL types:
- GitHub Repository:
Enter a URL using the following format:git://github.com/[organization]/[repository]/[branch]/path/to/crds
Example:git://github.com/cert-manager/cert-manager/master/deploy/crds - ArtifactHub Package:
Enter a URL in this format:https://artifacthub.io/packages/search?ts_query_web={model-name}
Check thesourceURLcolumn in the Meshery Integration Sheet and try one of the listed sources.
Step 6: Additional Settings
- Immediate Registration: Enable this option to register your model instantly, making it available in your Meshery instance right away.
- Visual Annotation Only: Mark this option if your model is intended solely for visual diagramming rather than infrastructure management.
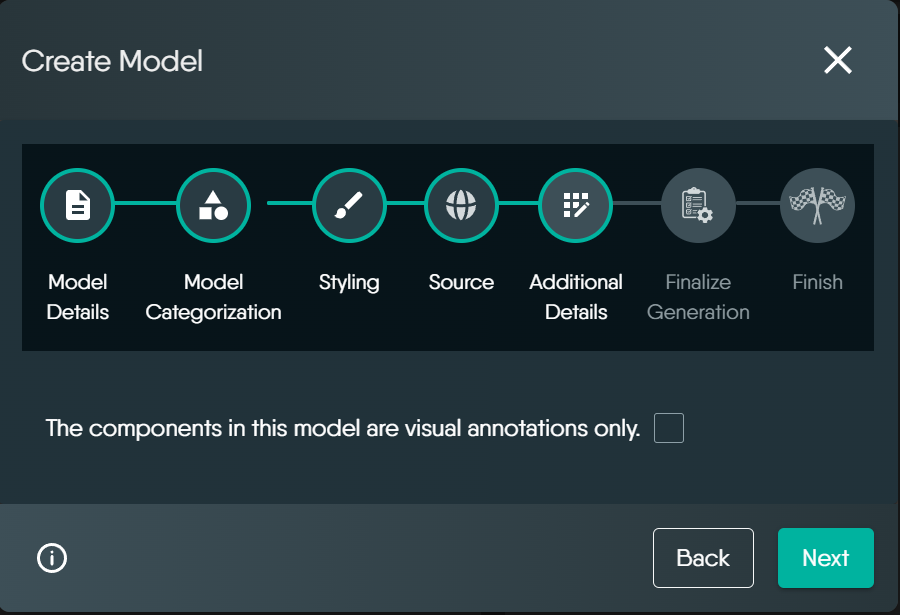
When a model is marked for visual annotation only, it means the model will be used purely for visualization and diagramming purposes within Meshery’s interface, rather than for actual infrastructure management.
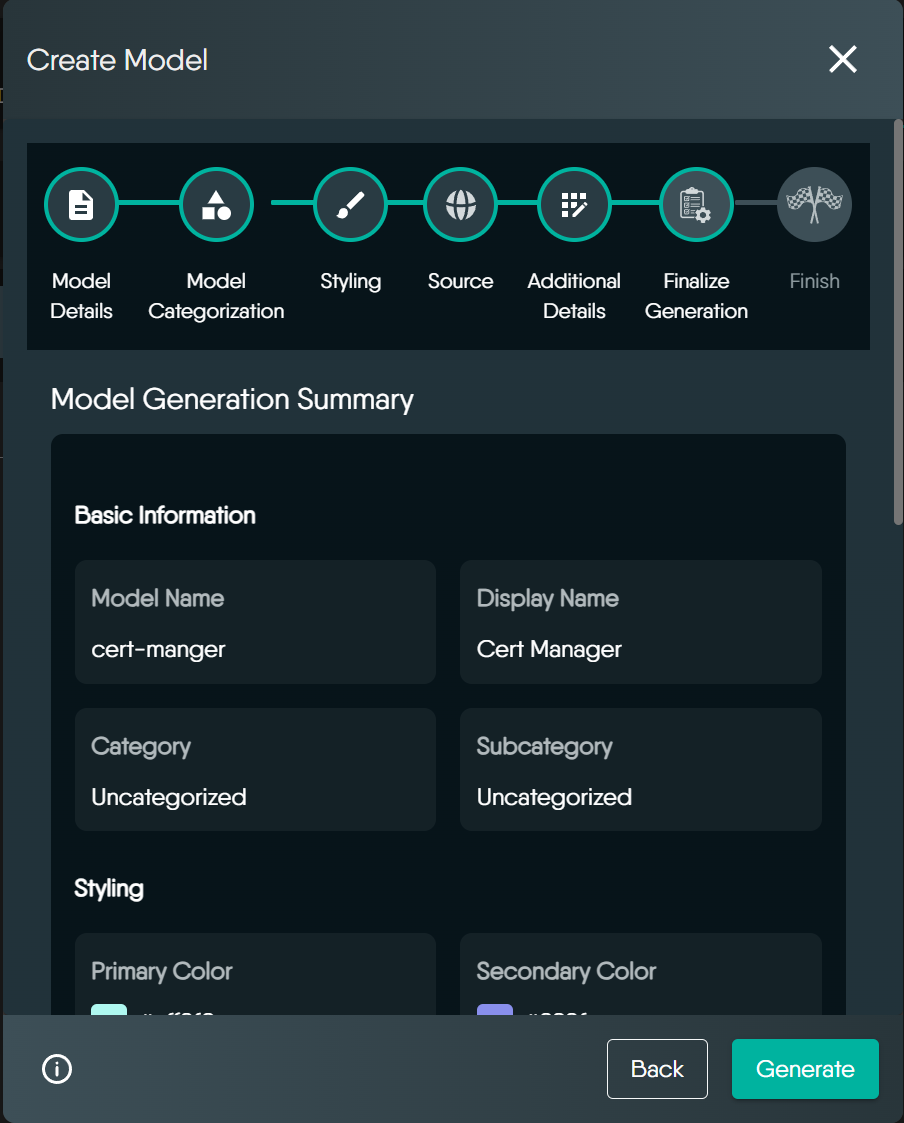
Step 7: Finalize and Create Your Model
Review your model details. If everything looks good, click "Generate" to create your model.
Meshery will process the provided source URL, extract the necessary information, and create the model based on the specified details.
If you want to make any changes before generation, you can go back to the previous steps using the navigation buttons and edit the details as needed.
Step 8: Check Model Generation Status
Once the model is successfully generated, a confirmation message will appear. You'll be able to view the model along with its components and relationships directly in the Registry page.
If any issues occur, Meshery will display an error message detailing what went wrong so you can correct it and try again.
A notification will also appear in the Notification Center to confirm whether the operation succeeded or failed, providing additional context if needed.
Once a model is generated, it cannot be deleted from the Meshery UI. If you no longer wish to use it, you may mark it as ignored instead.
Prerequisites:
- Fork the meshery/meshery repository.
- Install the Meshery CLI by following the installation instructions.
Meshery Server is not required to generate models. The Meshery CLI can be used to generate models. Model and Component generation logic is MeshKit. mesheryctl and Meshery Server both utilize MeshKit’s libraries for ongoing programmatic generation of models and components.
The scaffold workflow is the most direct way to hand-author a model - especially an annotation-only model (a curated set of icons used purely for visual diagramming). Unlike the CSV and Spreadsheet workflows, it does not require forking meshery/meshery or a Google Spreadsheet credential; it produces model files locally, packages them as an OCI image, and registers them into a running Meshery Server.
1. Scaffold the model
Generate the folder structure with mesheryctl model init:
mesheryctl model init digitalocean-icons --version v0.1.0This creates:
digitalocean-icons/
└── v0.1.0/
    ├── model.json # model definition (name and displayName are pre-filled from the argument)
    ├── components/ # one sample component; add one JSON file per component
    ├── relationships/
    ├── connections/
    └── credentials/
2. Edit model.json
Open digitalocean-icons/v0.1.0/model.json and set the model's identity and appearance:
category.nameandsubCategory- e.g.Platform/Cloud Provider.registrant.kind- e.g.meshery.description- a short summary of what the model provides.metadata.svgColorandmetadata.svgWhite- the model's display icon, as an inline SVG string (strip any<?xml ...?>header and collapse the SVG to a single line).metadata.isAnnotation- set totruefor an annotation-only (visual diagramming) model.
3. Add one component per capability
model init drops a single sample component under components/. Add one JSON file per component (delete the sample if unused). For each component set:
displayName- the human-readable name shown in the UI (e.g.DO Logo Icon Blue).component.kind- the unique identifier for the component (e.g.do-logo-icon-blue).styles.svgColorandstyles.svgWhite- the component's inline SVG.metadata.isAnnotation-truefor annotation components.
For the widest server compatibility, set each component’s schemaVersion to components.meshery.io/v1beta1 and the model’s to models.meshery.io/v1beta2. Meshery Servers only accept the v1beta3 component wire format once they ship a MeshKit new enough to recognize it; a released server that predates that support rejects v1beta3 components with a generic “No valid component or relationship found in the Model provided” error at import time.
4. Package the model as an OCI image
mesheryctl model build digitalocean-icons/v0.1.0This writes an OCI artifact named <model>-<version>.tar (e.g. digitalocean-icons-v0-1-0.tar) to your current directory.
5. Register the model into a Meshery Server
Import the packaged artifact (or the model directory) into your connected Meshery Server. This step requires a running server and an authenticated mesheryctl context (see mesheryctl system login):
mesheryctl model import -f digitalocean-icons-v0-1-0.tarVerify the result:
mesheryctl model view digitalocean-iconsSee Importing Models for the full set of import sources and Push or Pull a Model Image for packaging details.
1. Understanding the Template Directory
Inside your forked Meshery repository, you'll find the template-csvs directory containing three essential CSV files:
mesheryctl/templates/template-csvs/
├── Models.csv # Define model metadata and core properties
├── Components.csv # Specify individual components and their characteristics
└── Relationships.csv # Define how components interact and connect
2. Customizing Your Model
Creating your model involves modifying these CSV files to match your specific requirements. When making changes, you have two valuable references at your disposal: the existing entries in the CSV files serve as practical examples, while the integration spreadsheet provides comprehensive documentation of all possible fields and their purposes.
3. Generating Your Model
Once you've customized your CSV files, you can generate your model using a single command. Ensure you're in the root directory of your forked Meshery repository, as this maintains the correct file path relationships:
mesheryctl registry generate --directory mesheryctl/templates/template-csvs --model "YOUR_MODEL_NAME"The --directory flag takes the path to the folder that contains Models.csv and Components.csv (Relationships.csv is optional). This path is CSV-driven and does not require a Google Spreadsheet credential.
4. Locating Generated Files
After successful generation, your model's files will be created in the repository's models/ directory. You can find these files at meshery/models/[YOUR_MODEL_NAME]/. Take time to review these generated files to ensure they accurately reflect your intended model structure.
5. Troubleshooting
If you encounter issues during the generation process, you can use these diagnostic approaches to identify and resolve problems:
- Examine the detailed error logs at
~/.meshery/logs/registry/to understand specific generation issues. - Review your CSV files for proper formatting, ensuring all required columns are present and correctly populated.
- Confirm you're executing the command from the root of your forked Meshery repository.
Setting Up Your Environment
Before you begin working with the Integration Spreadsheet, you'll need to complete several important setup steps:
1. Spreadsheet Preparation
Start by creating your own copy of the Meshery Integration Sheet:
- Visit the Meshery Integration Sheet
- Make a copy using File > Make a copy
- Look at the URL of your new spreadsheet and note the ID (the long string between /d/ and /edit)
2. Google Cloud Configuration
Set up your Google Cloud environment with these steps:
- Create a new Google Cloud Project or select an existing one
- Enable the Google Sheets API for your project
- Create service account credentials
3. Credential Configuration
Set up your credentials in your local environment:
base64 -w 0 /path/to/your-service-account-creds.json
[For Linux users]base64 -b 0 -i /path/to/your-service-account-creds.json
[For MacOS users]echo 'export SHEET_CRED="paste-base64-output-here"' >> ~/.bashrcsource ~/.bashrcThe value passed to --spreadsheet-cred is the base64-encoded contents of the service-account JSON (the string itself), not a file path and not GOOGLE_APPLICATION_CREDENTIALS. Pass it as --spreadsheet-cred "$SHEET_CRED".
If $SHEET_CRED is empty or is not valid base64, mesheryctl reports Invalid JWT Token even though the real problem is the credential never decoded. Before running registry generate/registry update, confirm the variable is set and decodes cleanly: echo “$SHEET_CRED” | base64 –decode | head -c 20 should print the start of the JSON (e.g. {“type”: “service_).
4. Spreadsheet Access Configuration
- Open your copied spreadsheet
- Click "Share" in the top right
- Add your service account email (ends with @developer.gserviceaccount.com)
- Grant "Editor" permissions
- Publish the spreadsheet:
- File > Share > Publish to web
- Select "Comma-separated values (.csv)"
- Click "Publish"
Working with the Integration Spreadsheet
Once your environment is set up, you can begin working with the spreadsheet:
1. Adding Your Model
The integration spreadsheet contains existing model definitions that serve as practical examples. You can either create a new entry following the patterns in existing rows, or practice by generating an existing model first to understand the process. Each row represents a complete model definition, use them as reference for creating a new row.
2. Generating the Model
Use mesheryctl to generate your models. Make sure to run the command inside your forked meshery/meshery repo
mesheryctl registry generate --spreadsheet-id "YOUR_SPREADSHEET_ID" --spreadsheet-cred "$SHEET_CRED" --model "YOUR_MODEL_NAME"The command will:
- Read your spreadsheet data
- Validate the model definition
- Generate the model files
- For error logs your can checkout
~/.meshery/logs/registry/
3. Verification
The model will be generated in meshery/models/[YOUR_MODEL_NAME]
Meshery CLI has a set of commands that pertain to the lifecycle management of models:
mesheryctl registry- interact with and update spreadsheetsmesheryctl models- interact with and update Meshery Servermesheryctl component- interact with and update Meshery Servermesheryctl relationships- interact with and update Meshery Server