Exploring Kubernetes CronJobs
Introduction: In this tutorial, we will explore Kubernetes CronJobs, a resource that allows you to run jobs periodically at specified intervals. We will use Meshery Playground, an interactive live cluster environment, to perform hands-on labs for working with CronJobs in Kubernetes.
Prerequisites:
- Basic understanding of Kubernetes concepts.
- Meshery Playground access. If you don’t have an account, you can sign up at Meshery Playground.
Lab Scenario: Scheduled Backups using CronJobs
Objective: Learn how to use Kubernetes CronJobs to schedule and automate periodic backups of a sample application.
Steps:
1. Accessing Meshery Playground:
- Log in to the Meshery Playground using your credentials.
- Once logged in, navigate to the Meshery Playground dashboard.
2. Deploying an Application:
- Deploy a simple application that needs periodic backups. You can use a web application or any other application of your choice.
Deploying a web application
To deploy a web application on Meshery, follow these steps:
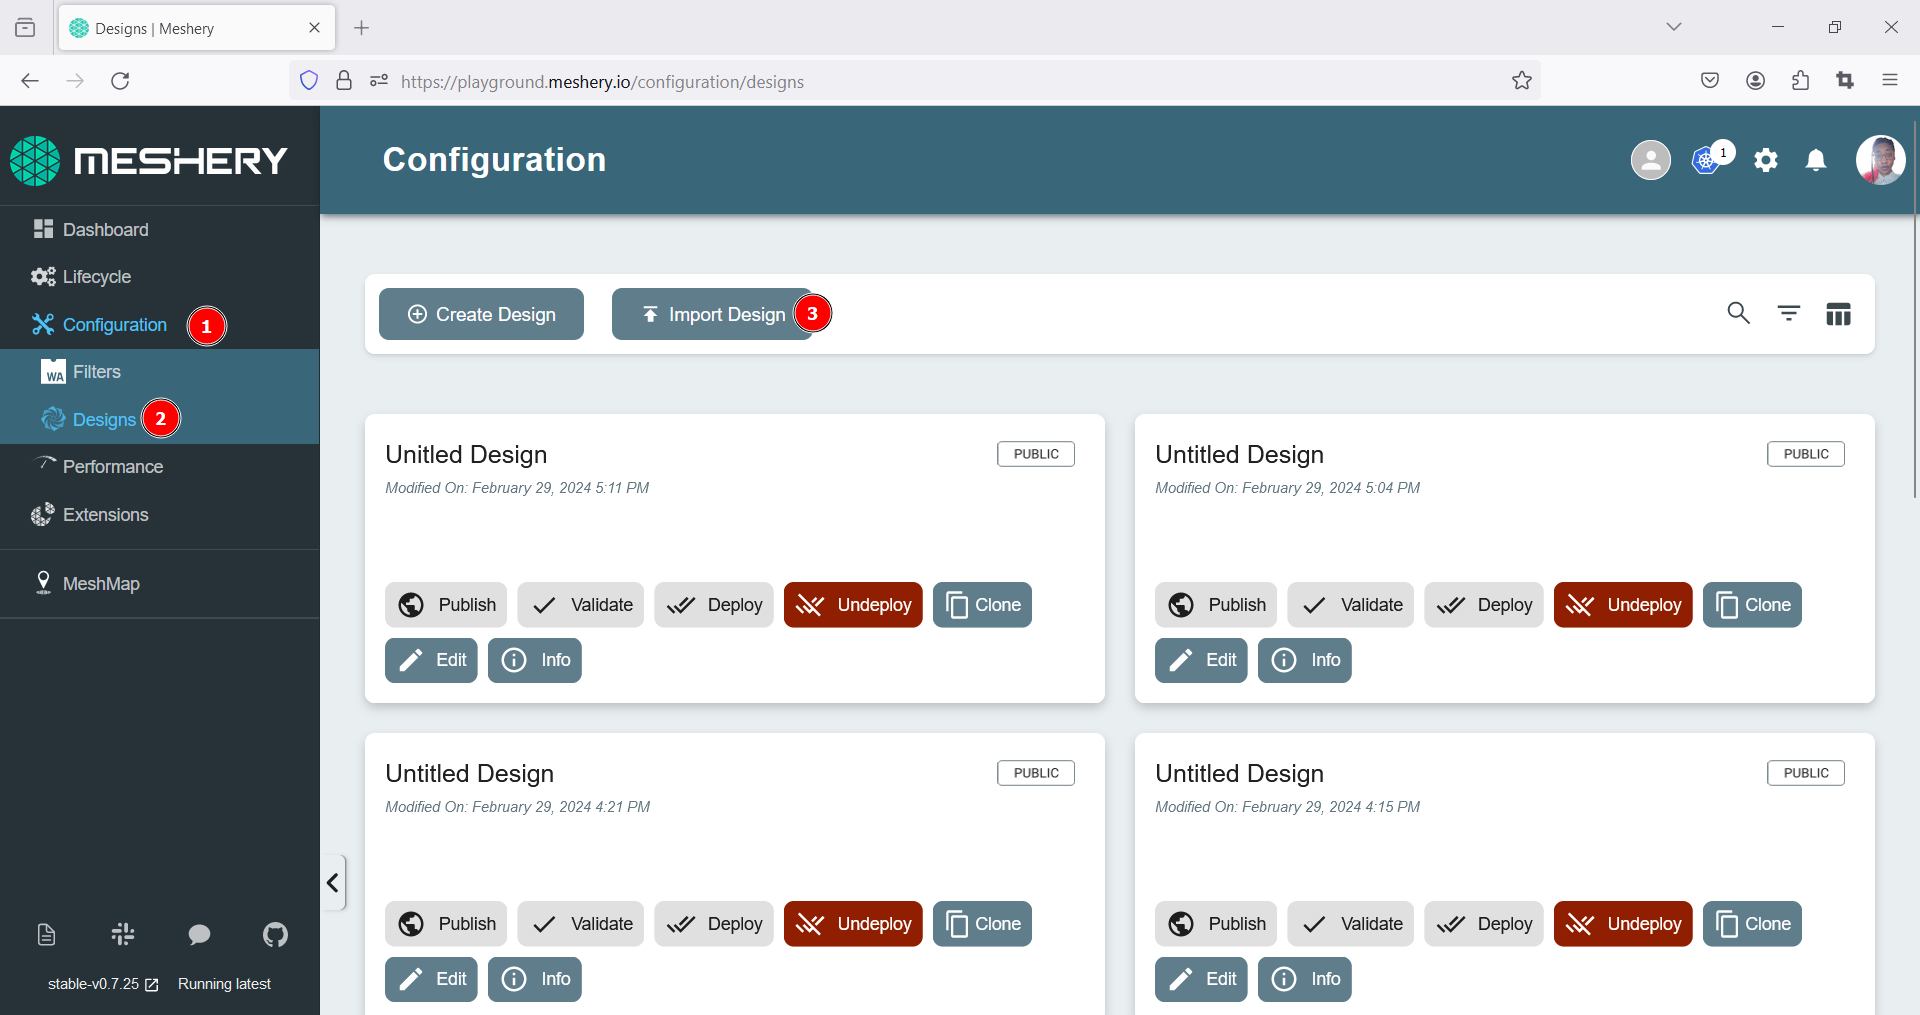
- Navigate to the Configuration menu in Meshery.
- Select “Designs” from the menu.
- Click on the “Import Design” button.
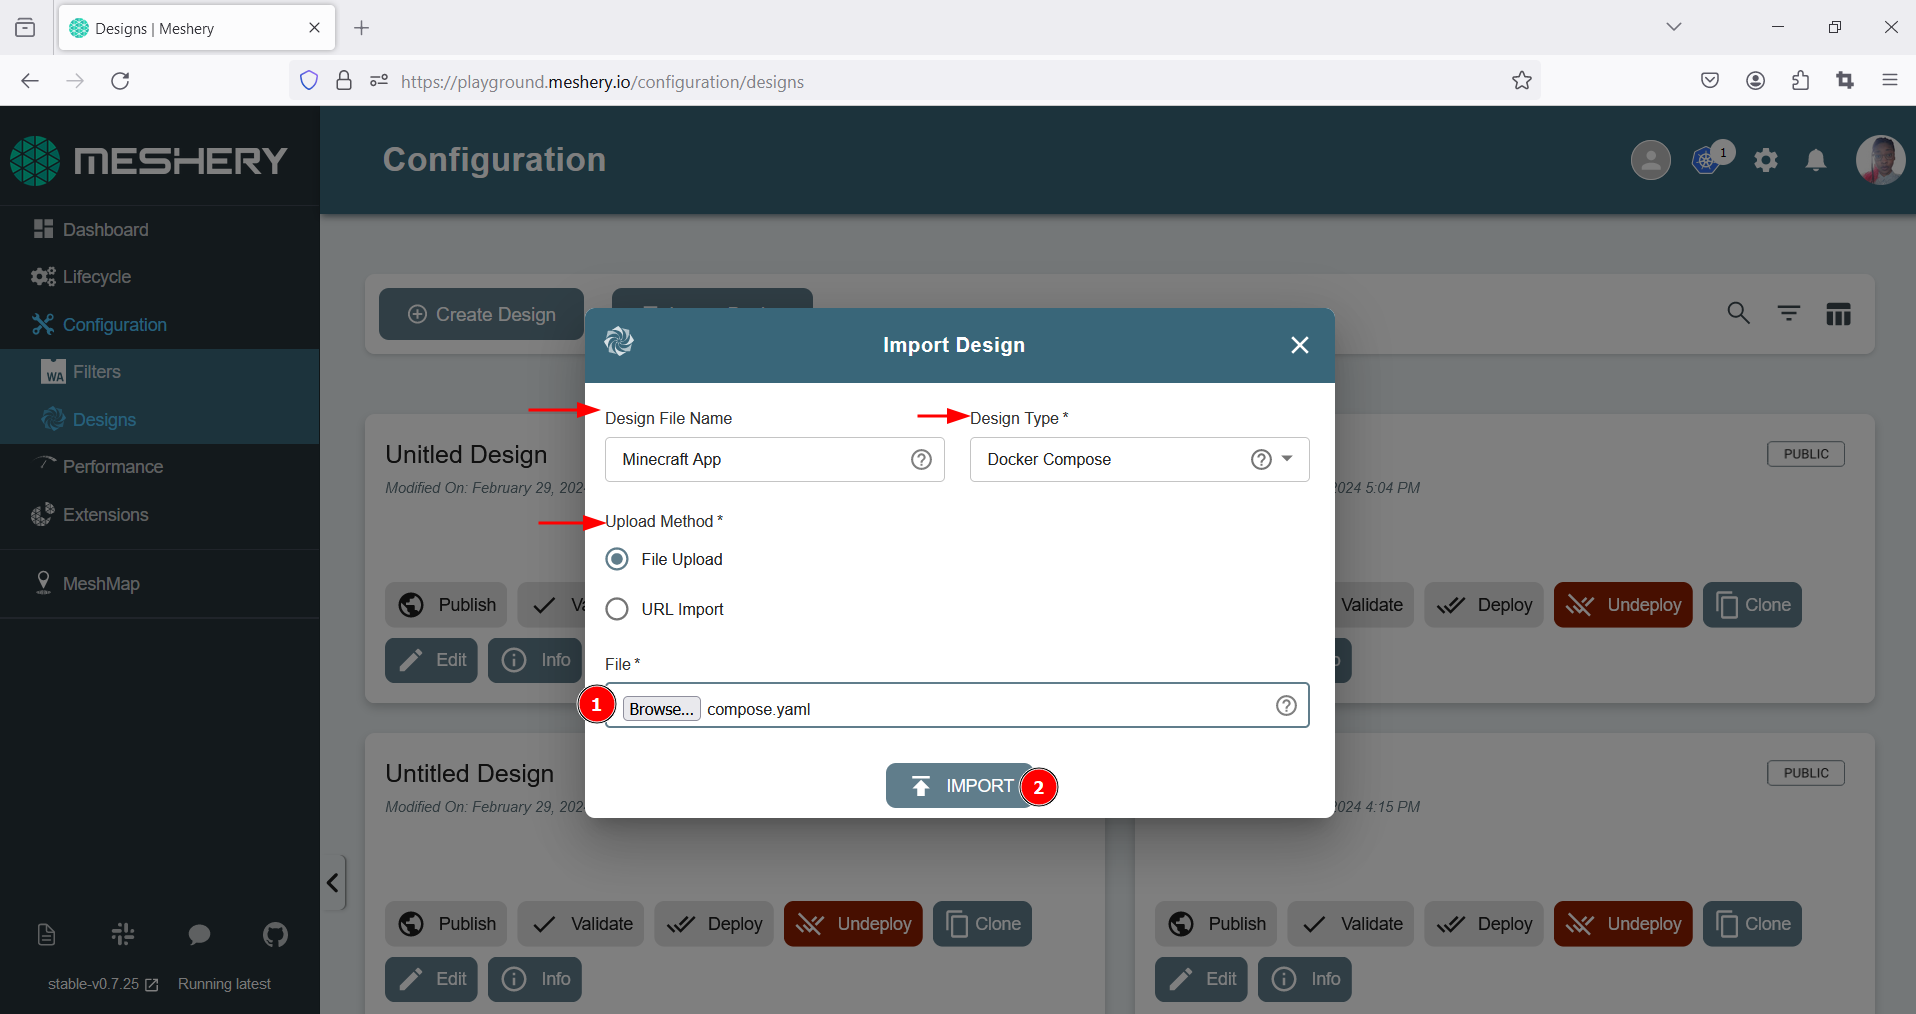
- Fill in the required details for your application or design, including the Design File Name, Design Type, and choose your preferred upload method:
- For File Upload, click “Browse” to locate and select the design file.
- For URL Import, paste the link to the design.
- Click the “Import” button to initiate the upload process.
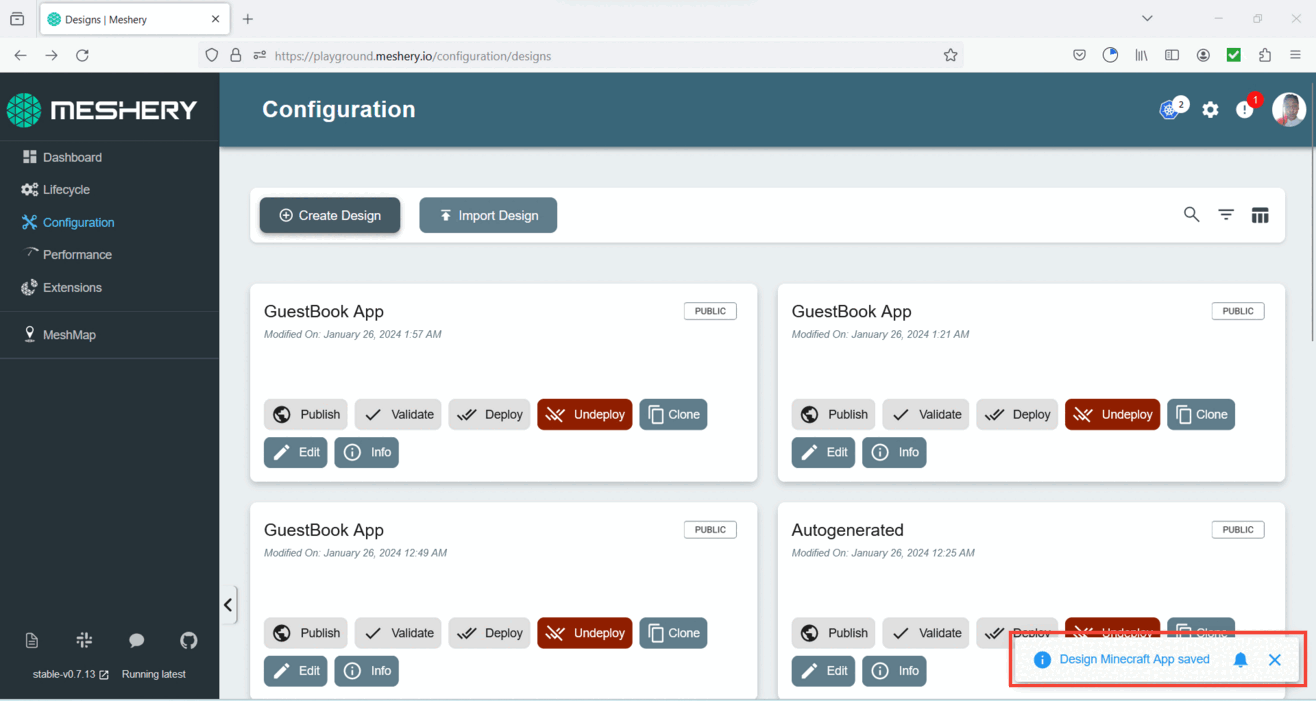
- Upon successful import, a pop-up message will confirm the completion, and it will also indicate that your design has been automatically saved in Meshery.
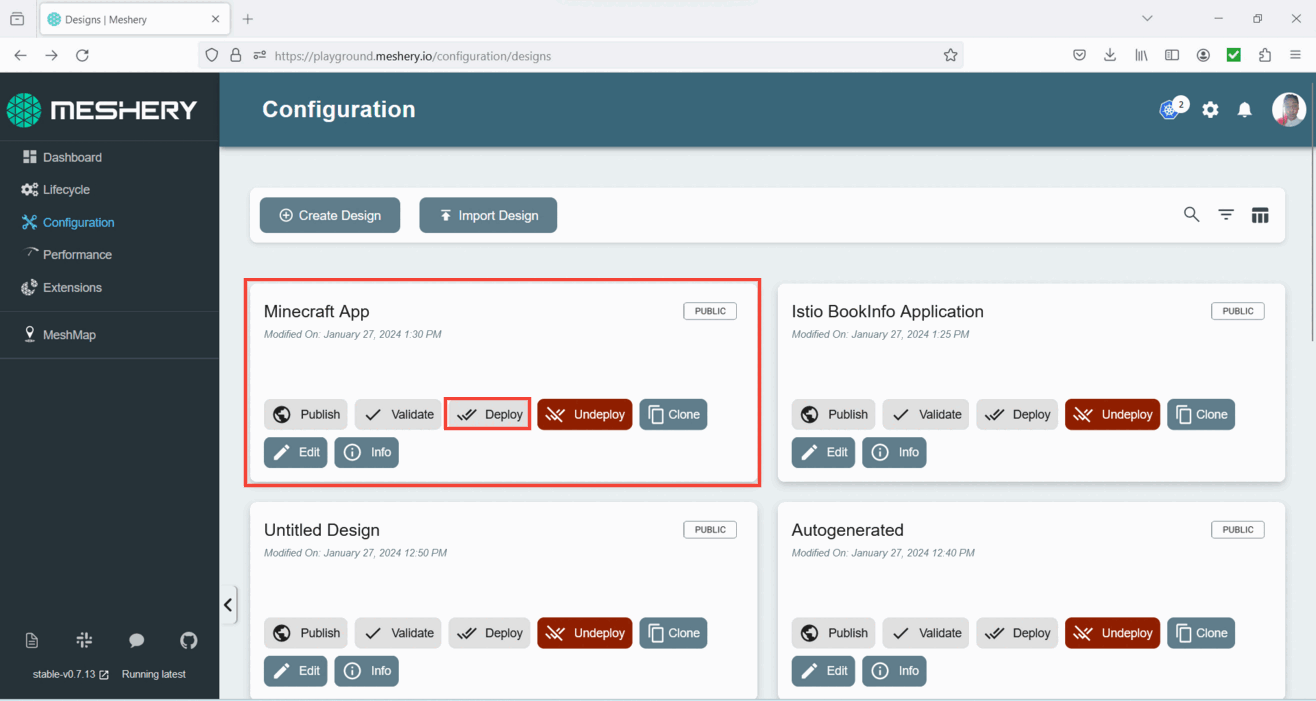
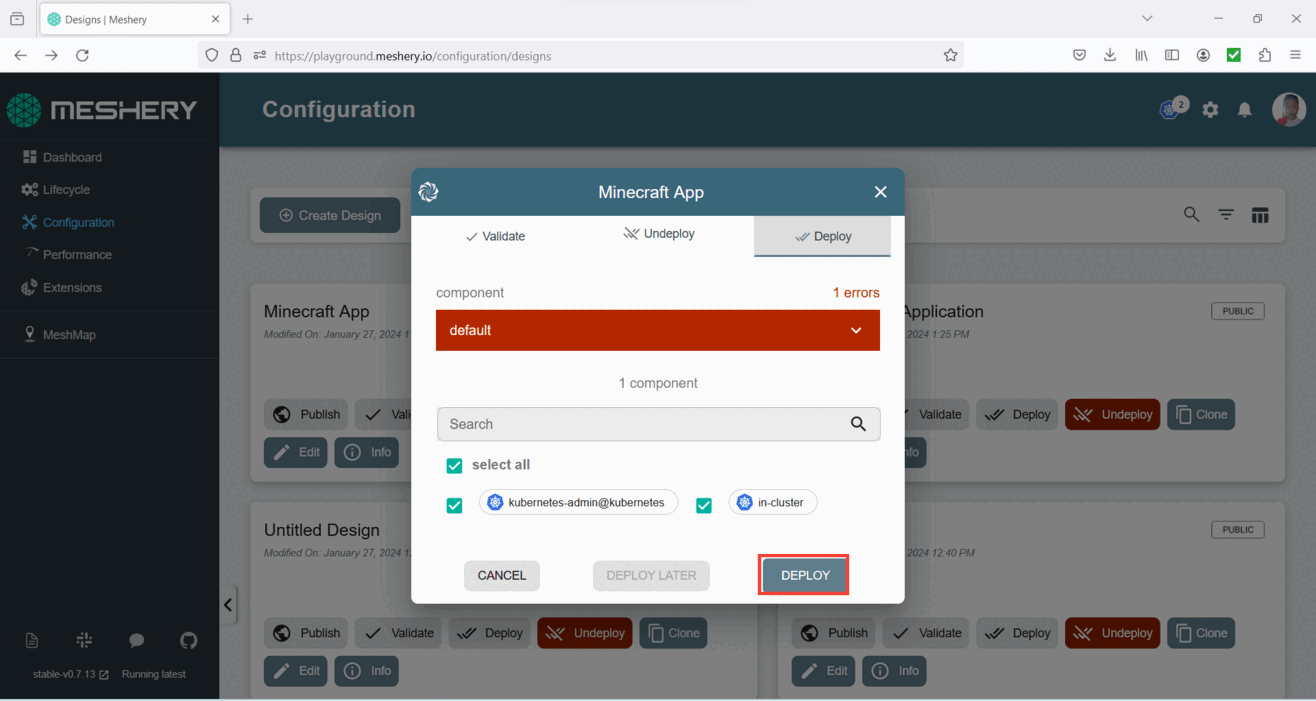
- Locate your design and click the deploy button to initiate the deployment process.
- Once the popup window opens, wait for the dry run to complete, and then click the deploy button.
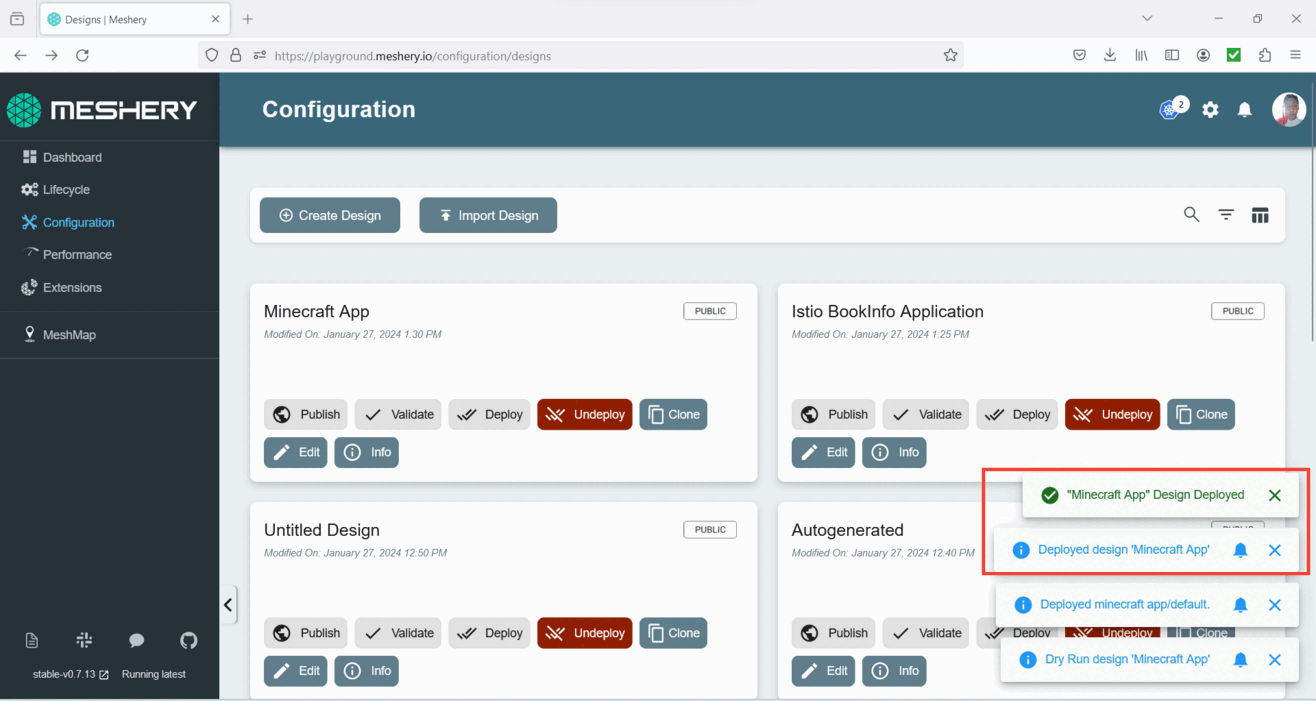
- Upon successful deployment, a confirmation pop-up will appear, indicating that your app has been successfully deployed.
3. Creating a CronJob for Backups:
- Create a CronJob that runs a backup script at a specified interval to back up the application data.
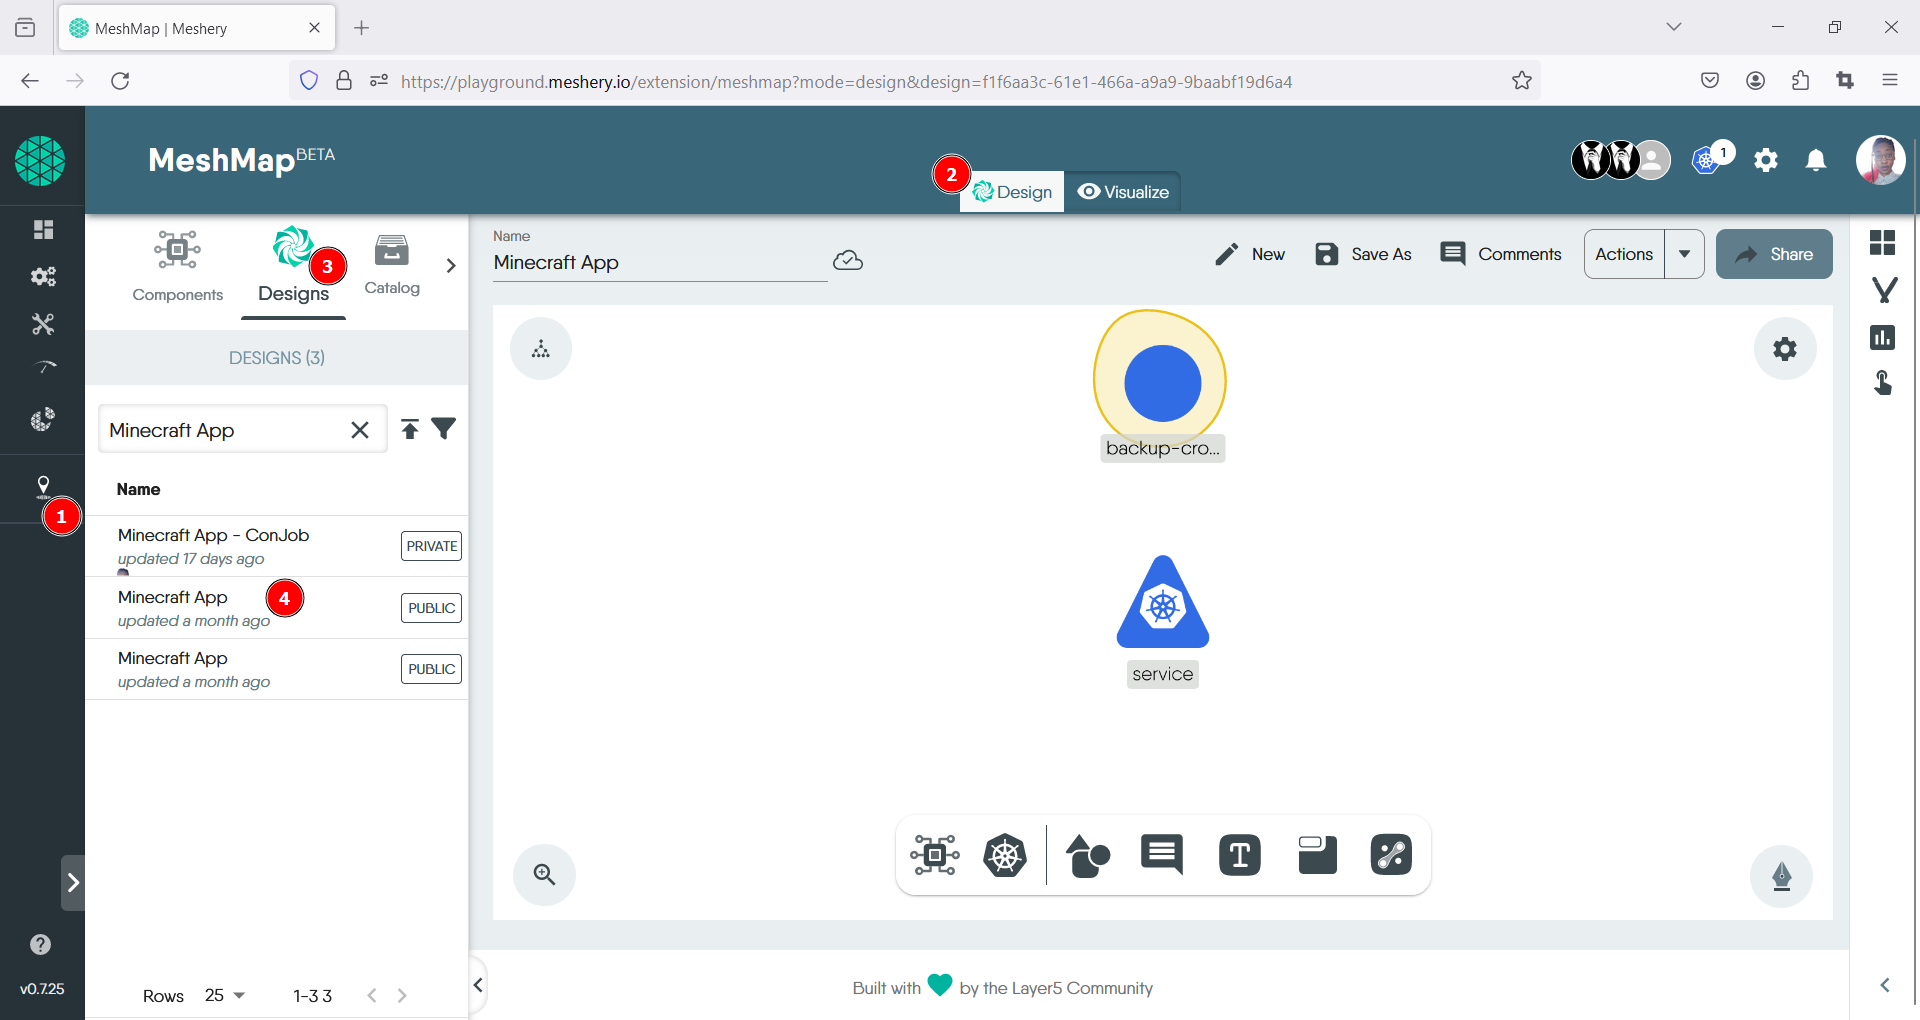
- Open the Kanvas tab located in the left panel.
- Upon opening Kanvas, ensure that you are on the Design tab, which can be found at the top center of the canvas.
- Navigate to the Design option located in the top menu of the left panel. Using the search bar, type in the name of your app, which in this instance is the Minecraft App.
- Once your app appears in the list, click on it to upload the design file onto the canvas.
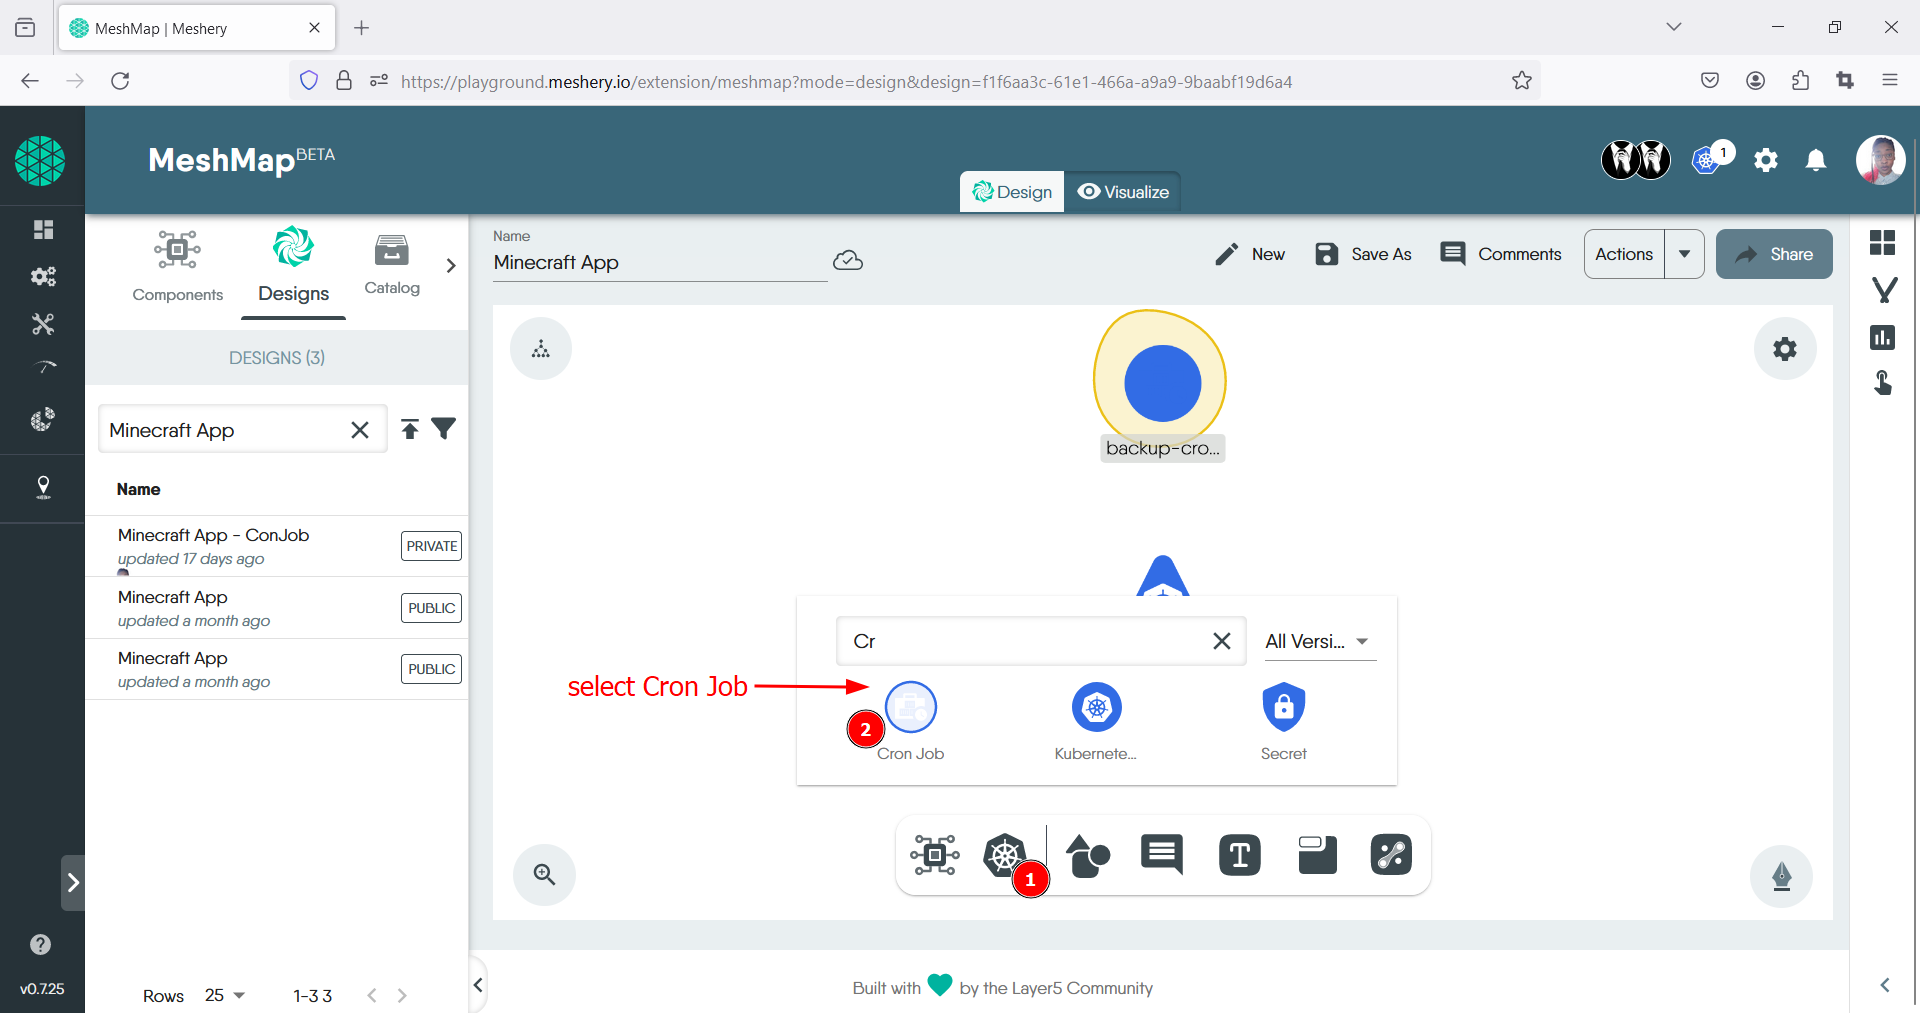
- Locate the control panel at the bottom of the canvas and choose the Kubernetes option.
- Using the search bar, enter “Cron Job” and click on the corresponding icon to display it on the canvas.
- Once the cronjob component appears on the canvas, click on it to open the toolbar and begin configuration.
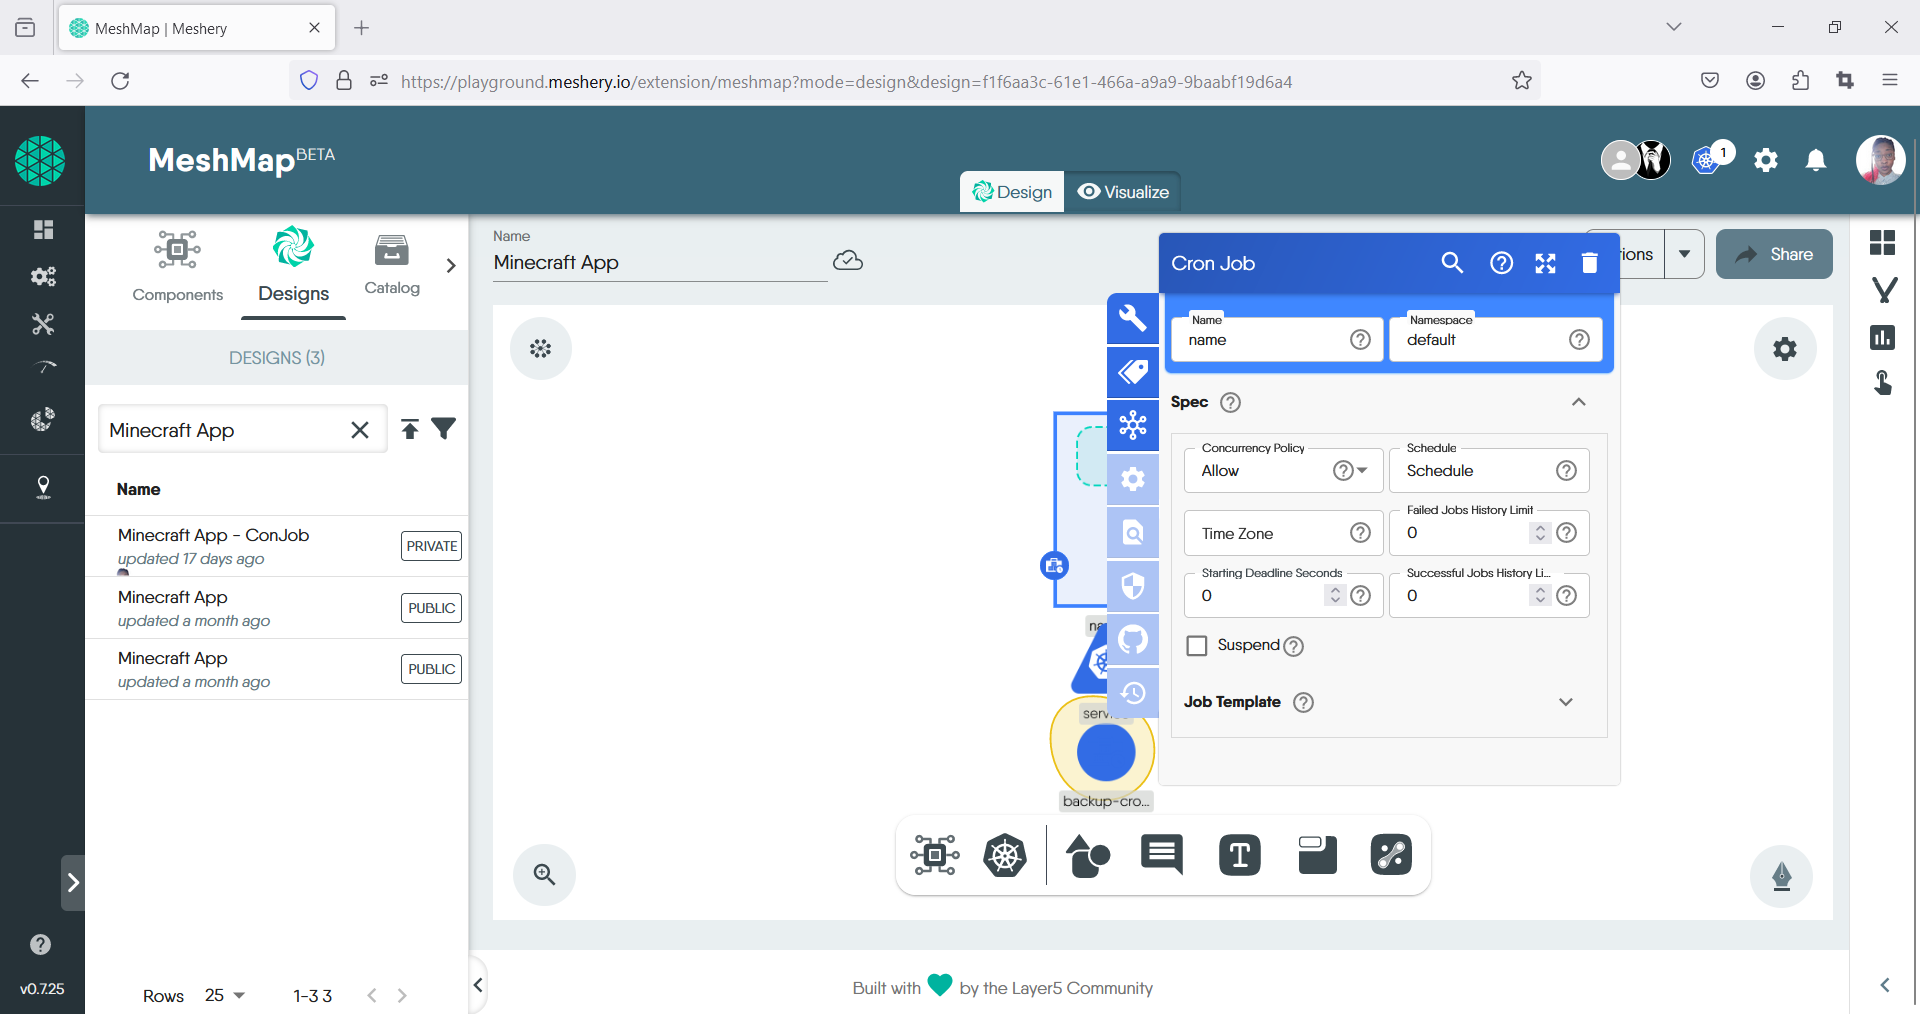
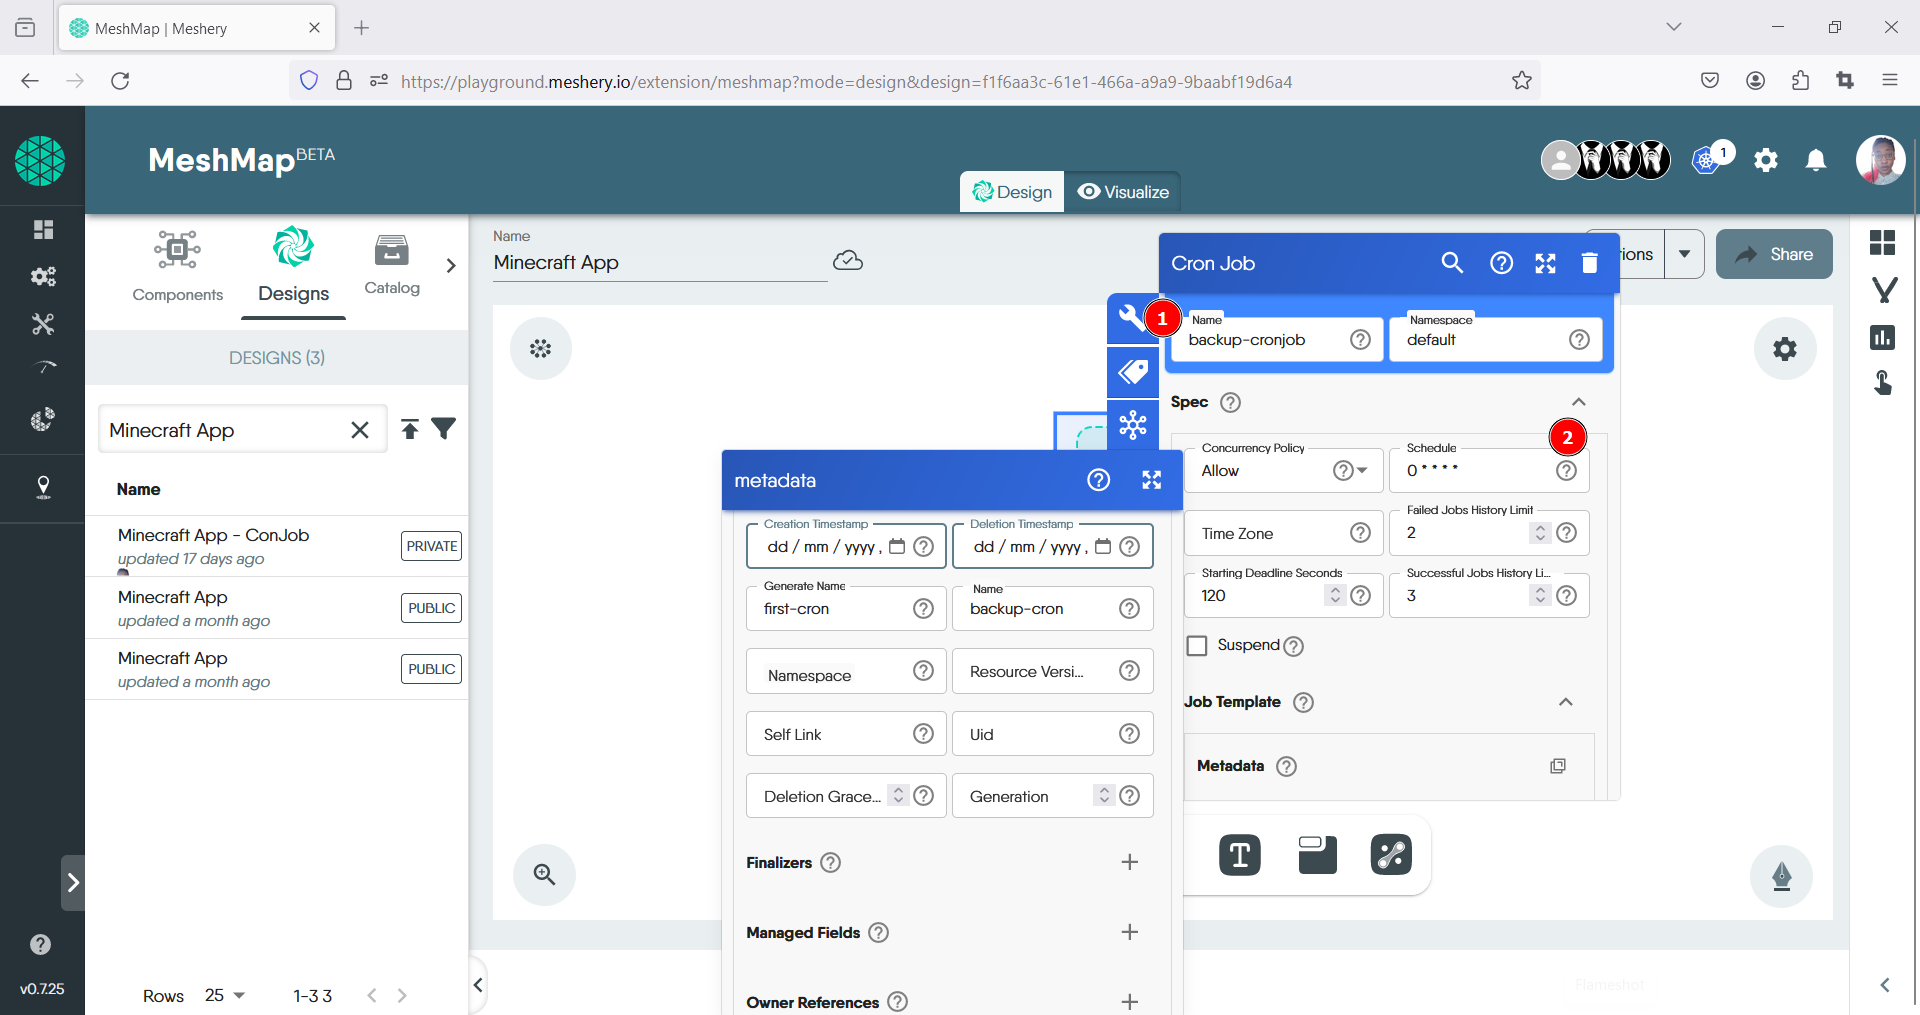
- Fill out the details for the CronJob i.e Name field: “backup-cronjob”. Under Spec, enter the specifications, i.e schedule: “0 * * * *” to run every hour.
-
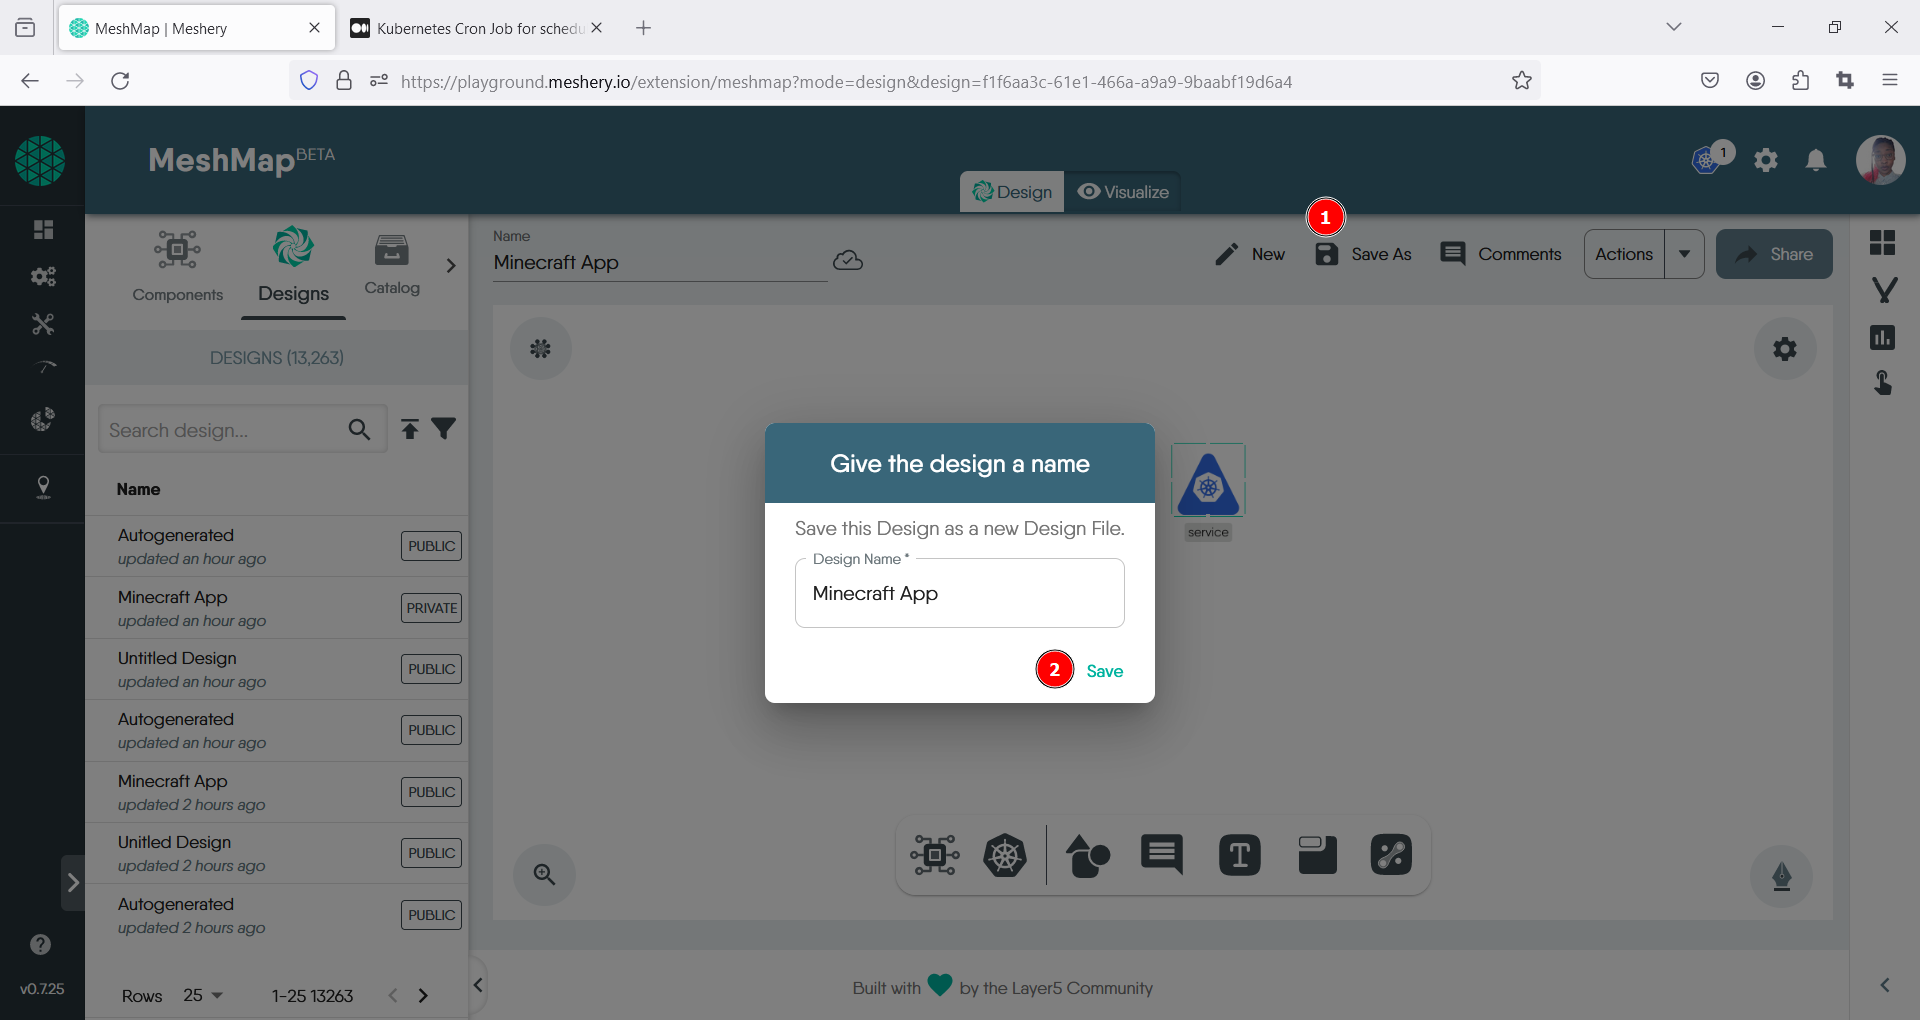
Locate the Save As icon in the top right, once the pop up modal opens, give your design a name, then click save.

- Thereafter click on the Action drop down menu also located in the top right and click on the Deploy option.

- In the pop-up window, review and correct any errors as necessary. Then, click the deploy button.
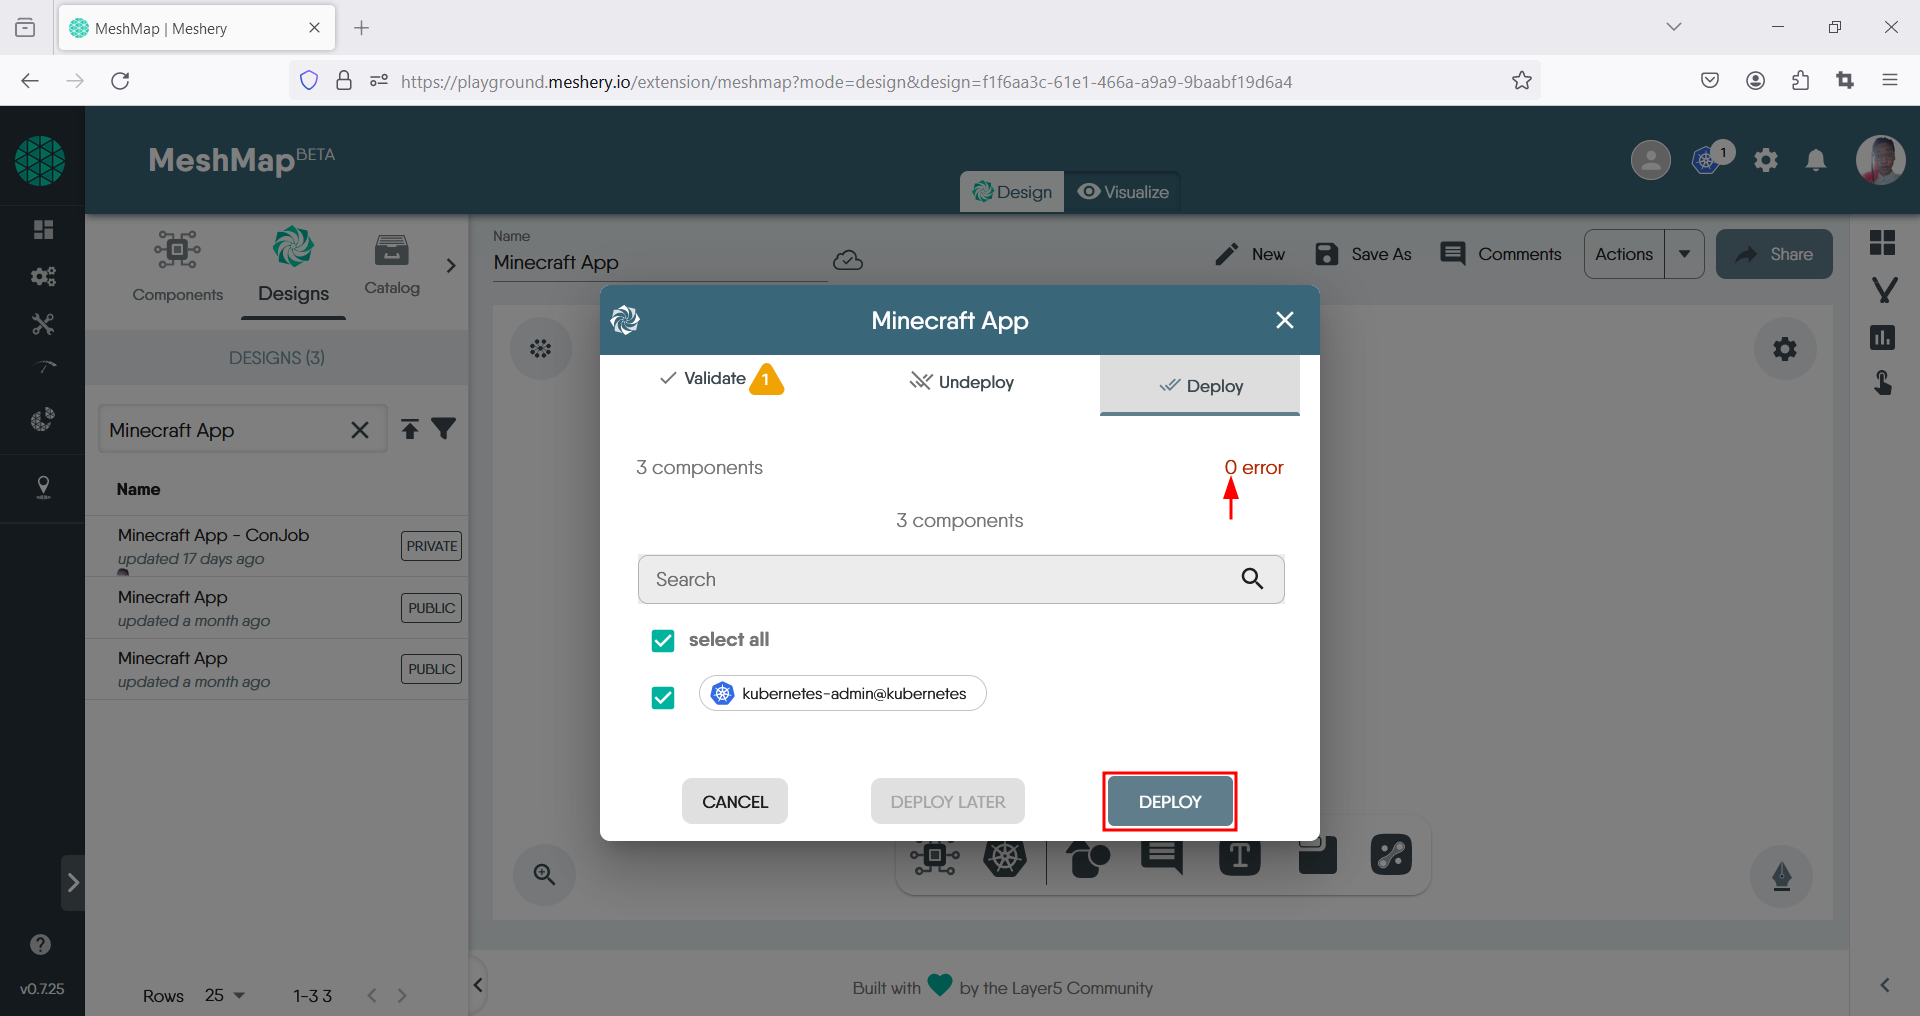
- You’ll receive a confirmation message indicating that your app has been successfully deployed.
4. Verifying CronJob Execution:
- Monitor the execution of the CronJob and verify that backups are created at the specified intervals.
To view the resources created for the CronJob, we will utilize the Visualize tab of the Kanvas. A view will be created with necessary filters to display the relevant resources.
- Ensure that you are on the Visualize tab, located at the top center of the canvas.
- Give the view a name.
- Click on the filter icon.
- Choose appropriate filters; for this lab, select the kind item that was set earlier during the CronJob creation, i.e., ‘CronJob’.
- Click the filter icon again to close. This action should display a filtered view with only your resources, similar to the screenshot below:

5. Scaling and Updating CronJobs:
- Explore how to scale the CronJob or update its schedule by modifying the CronJob configuration.
- Return to the Designer tab
- Select the CronJob Design: Choose the design that contains the CronJob you want to scale from the list of existing designs.
- Locate the CronJob Component:
Within the design canvas, identify the representation of the CronJob you wish to scale. It should be labeled as “CronJob” or have a specific icon associated with CronJobs.
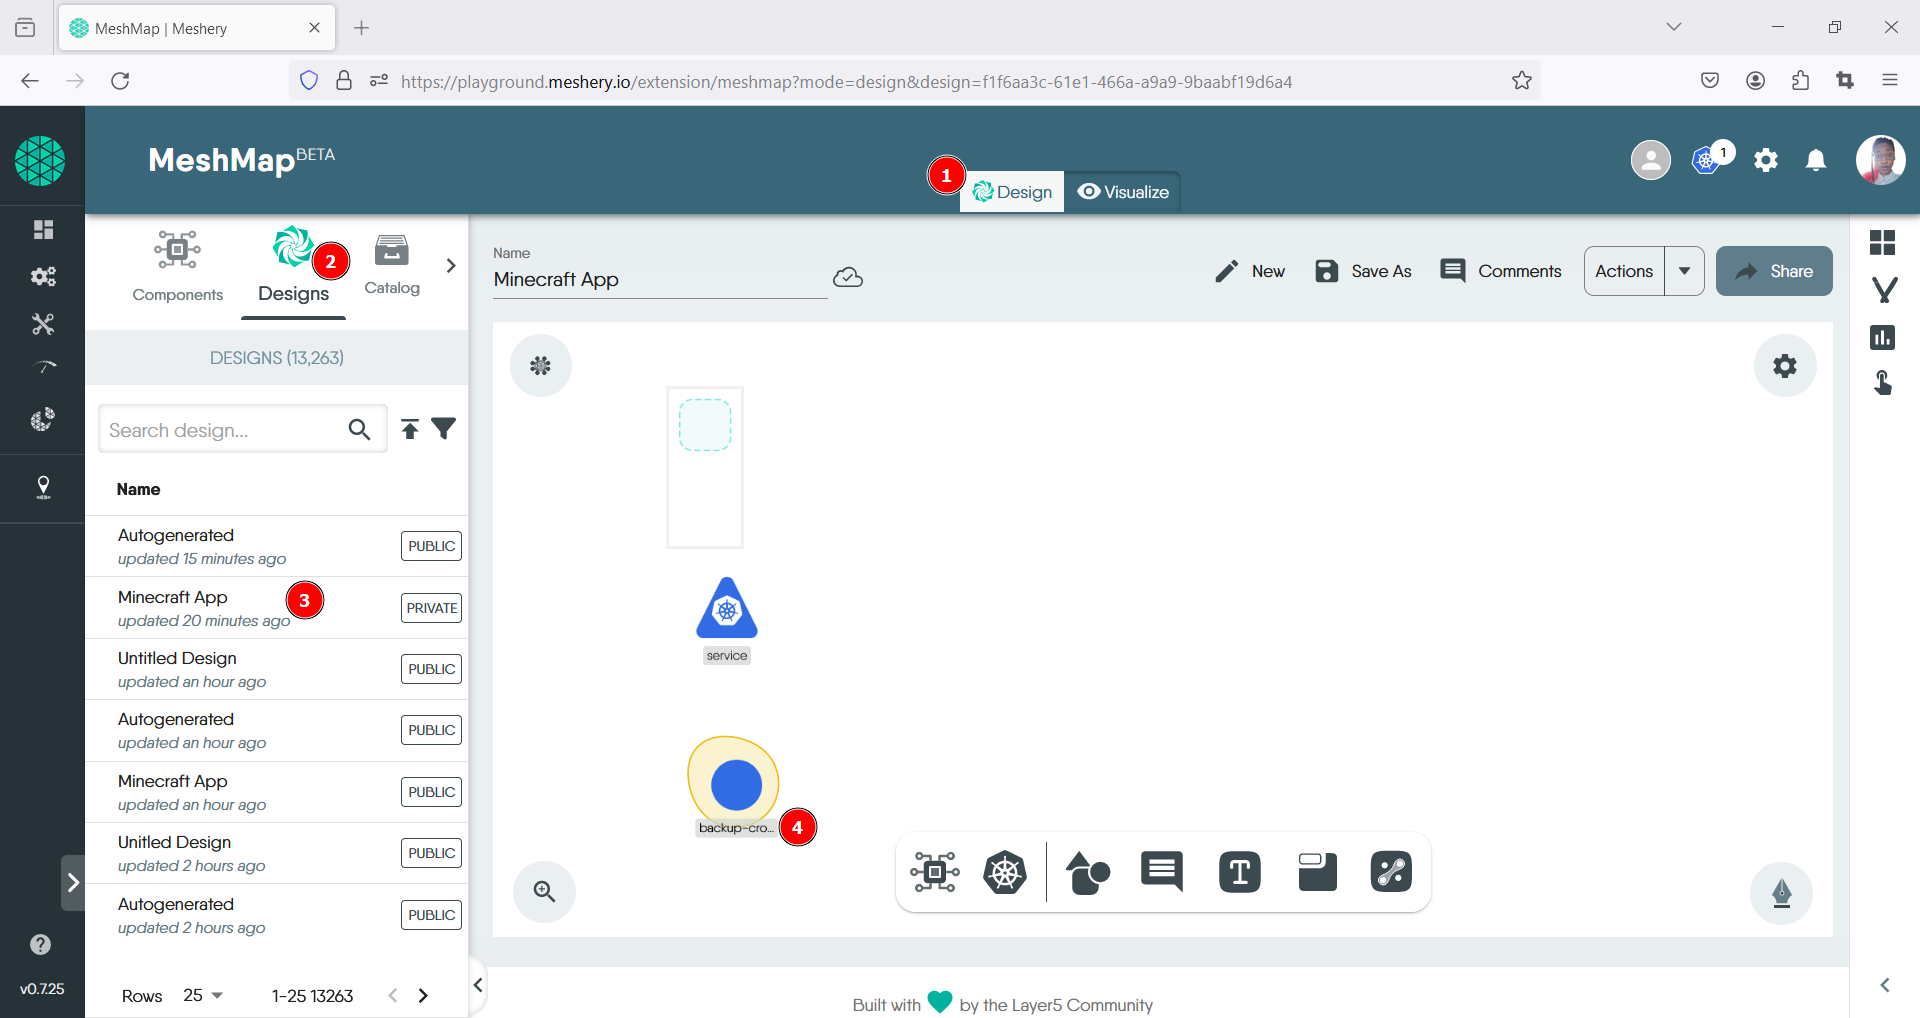
- Select the CronJob Component: Click on the CronJob component to open the toolbar..
- Continue to configure your cronjob with your preffered specifications that match your desired scaling options.
-
Adjust the Number of Replicas or Parallelism: Within the toolbar, locate the field related to the number of replicas or parallelism for the CronJob. Adjust this value to scale the CronJob up or down according to your requirements.

- Save Changes:
After verifying the adjustments, save the changes made to the CronJob settings within the Kanvas Designer interface to ensure they are retained for future reference.
 <!–
<!–
Show user how to use Designs and components in Kanvas Designer.
–>
Use Meshery Playground to visualize the changes and observe the impact on the scheduled backups.
6. Clean-Up:
- Delete the CronJob and application resources after completing the lab.
- Identify the CronJob Component: Within the design canvas, find the representation of the CronJob you wish to delete. It should be labeled as “CronJob” or have a specific icon associated with CronJobs.
- Select the CronJob Component:
Click on the CronJob component to open the tooltip. This action will enable access to the delete icon. Click to delete the CronJob.

- Save Changes:
After deleting the CronJob, save the changes made within the Kanvas Designer interface to reflect the cleanup.
 <!–
<!–
Show user how to use Designs and components in Kanvas Designer.
–>
7. Saving and Sharing
Share your scenario with other Meshery users or the community for collaborative learning.
- Save Your Scenario:
- Click the save option in Kanvas Designer and give your scenario a descriptive name.
- Make Design Public:
- Toggle the visibility of your design to “Public” to allow others to view it.
- Share Your Design:
- Copy the shareable link or invite collaborators directly from Kanvas Designer.
- Invite Friends to Collaborate:
- Share the link with friends or collaborators to enable collaboration on your design.
- Confirm Sharing Settings:
- Ensure sharing settings align with your preferences, such as viewing, editing, or commenting permissions.
- Save Changes:
- Save any changes made to the sharing settings to apply them.
Conclusion
Congratulations! You’ve successfully completed the lab on exploring Kubernetes CronJobs using Meshery Playground. This hands-on experience has provided valuable insights into scheduling and automating tasks in Kubernetes using CronJobs. Explore more scenarios in the Meshery Playground to enhance your skills in cloud-native technologies.