Contributing to Meshery Server
As a new contributor, you’re going to want to familiarize with the project in order to resolve the issues in the best way. Installing and playing around with Meshery will give you context for any issues that you might work on.
Once an issue has been addressed, you’ll need to test it as well. Ideally, these tests are run from the user’s perspective (someone running Meshery in a container), not from a contributor’s perspective (someone running Meshery as a locally-compiled service).
Compiling and Running Meshery server
To build and run Meshery server from source:
- Build the static assets for the UI by running
make ui-setup
make ui-build
- Build & run the server code by running
make server
Any time changes are made to the Go code, you will have to stop the server and run the above command again.
Once the Meshery server is up and running, you should be able to access Meshery on your localhost on port 9081 at http://localhost:9081. One thing to note, you might NOT see the Meshery UI until the UI code is built as well.
After running Meshery server, you will need to select your Cloud Provider by navigating to localhost:9081. Only then you will be able to use the Meshery UI on port 3000.
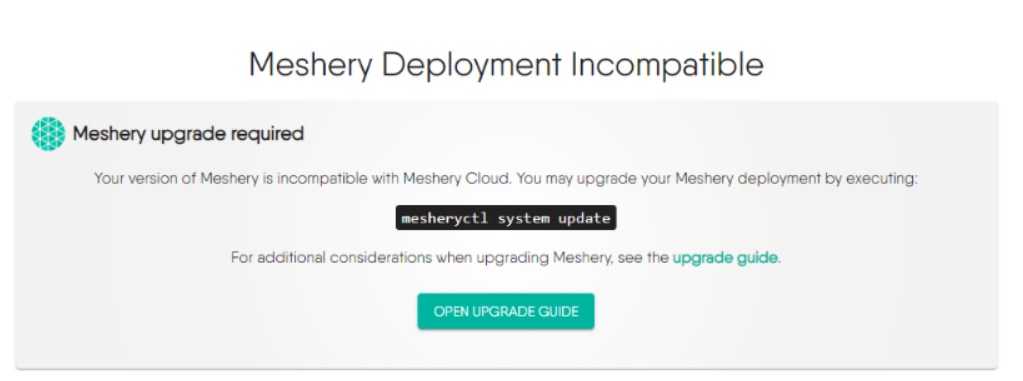
Please note: If you get error while starting the server as “Meshery Development Incompatible” then follow the below guideline 👇
Potential Solution:
-
Go to your meshery folder in your local-system where you’ve cloned it. Execute:
git remote add upstream https://github.com/meshery/mesherygit fetch upstream- Restart the meshery server
- Additionally, before restarting the server, if you like to pull the latest changes, you can do:
git pull upstream master
Building Docker image
To build a Docker image of Meshery, please ensure you have Docker installed to be able to build the image. Now, run the following command to build the Docker image:
make docker
Define and validate errors
Every Golang-based component within the Meshery ecosystem incorporates a utility to define and manage error messages for every error instance. This is internally done with several make commands, but one can explicitly validate with the help of the following make command. This checks and validates the errors that are present in the particular project.
make error
For more details, Error Utility
Configuring Log levels at Runtime
The server log levels can be configured at runtime by changing the env variable LOG_LEVEL defined in file server-config.env. The configuration library (viper) watches for the env file, any change in the file content results in the file_system event to be emitted and the log level is updated accordingly.
Should there be any alterations to the location or name of the environment file, it will result in the inability to configure log levels during runtime. In the event of such modifications, it is essential to update the server to preserve proper functionality.
```Available Meshery Server log levels are:
- Panic - 0
- Fatal - 1
- Error - 2
- Warn - 3
- Info - 4
- Debug - 5
- Trace level - 6 ```
The default setting for the LOG_LEVEL is 4 (Info). However, if the DEBUG environmental variable is configured as TRUE, it supersedes the value set in the LOG_LEVEL environmental variable, and the logging level is then adjusted to 5(Debug).
Runtime Configuration Environment Variables
Meshery Server supports several runtime configuration environment variables that control various aspects of server behavior:
Provider and Extension Configuration
PROVIDER_CAPABILITIES_FILEPATH: Specifies a local file path to load provider capabilities from a static JSON file instead of fetching from the remote provider’s endpoint. Useful for offline development and testing.- Default: Not set (capabilities fetched from remote provider)
- Example:
PROVIDER_CAPABILITIES_FILEPATH=/path/to/capabilities.json
SKIP_DOWNLOAD_EXTENSIONS: Controls whether Meshery downloads and refreshes provider extension packages during login and capability refresh operations.- Default:
false(extensions are downloaded/refreshed) - Example:
SKIP_DOWNLOAD_EXTENSIONS=true - Use cases: Development environments, pre-packaged deployments, reducing startup time
- Default:
Kubernetes Configuration
KUBECONFIG_FOLDER: Specifies the folder path where Meshery should look for Kubernetes configuration files. This allows you to provide a Meshery deployment with a predefined Kubernetes context.- Default:
$HOME/.kube(or/home/appuser/.kubein containerized deployments) - Example:
KUBECONFIG_FOLDER=/home/appuser/.kube - Use cases: Custom kubeconfig locations, pre-configured Kubernetes contexts, containerized deployments
- Note: Meshery looks for a
configfile within this folder (e.g.,/home/appuser/.kube/config)
- Default:
Other Configuration Variables
SKIP_DOWNLOAD_CONTENT: Skips downloading seed content for patterns, filters, and applications.- Default:
false
- Default:
SKIP_COMP_GEN: Skips component generation during startup.- Default:
false
- Default:
PLAYGROUND: Enables playground mode for Meshery.- Default:
false
- Default:
Using custom Meshkit code for Meshery server development
-
Checkout meshery and meshkit repository in adjacent directories.
$ git clone https://github.com/meshery/meshery.git $ git clone https://github.com/meshery/meshkit.git -
In your
mesherygo.mod, update the meshkit package.github.com/meshery/meshkit => ../meshkitRemember to remove this go.mod change when creating pull requests.
